Blog

DIY Projects To Upgrade Your Home on a Budget

Stencil Your Walls

woman stenciling wall
COURTESY OF EMMA COURTNEY

Wallpaper can be spendy and hard to hang. Understatement of the year? Enter: this idea from Emma Courtney, a DIYer based in Toronto. She faked the luxe look of real paper using paint and a stencil from Etsy (stenciledup.etsy.com). According to Courtney—and the crew who prepped the set for our cover shoot—the key here is patience. “You also want a stencil with a registration mark,” Courtney says. These marks are small design elements cut into the edge of the stencil that help you repeat the pattern evenly. Carve out a few hours per wall, gather your supplies, and follow these steps.

  1. Clean and prep your walls as you normally would before painting, sanding down imperfections and making sure they’re free of grease, dust, and schmutz.
  2. Position your stencil either in a corner or at a focal point (say, the middle of the wall over a fireplace) and start from there.
  3. Use a level to confirm that the stencil is straight and secure it with painter’s tape around the edges.
  4. Dip a foam roller or foam brush in paint and remove any excess. Roll or dab it over the stencil—gently! It’s better to use a light touch and apply multiple layers than to go super heavy on the first stab and risk bleeding. Add more coats as needed.
  5. Once you’re finished with that spot, carefully remove the stencil and place it next to the section you just completed, lining it up evenly. Secure it with painter’s tape and repeat! Keep repeating until the entire wall has been stenciled.
  6. Finish with touch-ups. Go in with a small paint-brush to clean up edges or fill in any spots.

Add Cookbook Storage to Your Kitchen Island

art book storage on kitchen island
COURTESY OF DANIELLE GUERRERO

“I’d been looking for a place to store my cookbooks that wasn’t on my limited counter space,” says DIYer Danielle Guerrero of Corona, California. Eventually, she came up with the idea to add picture ledges to the side of her kitchen island—real estate that had been going to waste. Danielle made her own shelves, but you don’t have to! These ready-to-hang options should work great: Syler ModernMetal Wall Shelfwayfair.com.

DIY a Headboard

DIY headboard
COURTESY OF MARGARET WRIGHT

Any guesses as to what this headboard is made out of? Hint: The answer rhymes with schmool boodles. That’s right—pool noodles! Margaret Wright, an interior photographer in Charleston, South Carolina, used them for this splashy design. “I wanted a large arch, and when I saw a different DIY involving stacked noodles, I realized it was a great solution. I could bend them to create what I wanted,” she says. First, she measured her space and mapped out the dimensions. Then she wrapped a bunch of pool noodles in fabric using hot glue, and glued some noodles together to make long-enough pieces. She attached the noodles to a foam-board backing, which she had cut out in an arch shape and covered with that same fabric. Row after row, she repeated until she had a nice border. She really used her noodle!

Replace Pantry Doors With Something Unique

pantry with unique doors
COURTESY OF RYIA JOSE

Houston-based DIYer and designer Ryia Jose could have bought brand-new doors for her pantry but decided on a more original approach. She found banged-up European double doors on Facebook Marketplace for $500 and got to work. First she sanded down the rough spots and applied wax polish to help protect the wood. Then she gave the glass a major scrub with MeanGreen Degreaser to remove decades of dirt. She replaced missing panes with green stained glass from a wholesaler, using a bit of silicone sealant (a.k.a. glue). The final steps were adding brass hinges, a magnetic door closure, and vintage brass doorknobs from Etsy. “All in all, these doors were a project, but I’m stoked with how they turned out,” Jose says. “They make such a statement in my kitchen.” Adoorable!

Hide the TV

television covered with foliage art
COURTESY OF AMANDA WALKER

Amanda Walker came up with a cute and easy way to hide her big screen when it’s not in use. First, the Dallas blogger made a shelf a couple of inches wider than her TV, with a lip at the bottom deep enough to house a rolled-up shade. (If you buy a shelf, get one with an apron trim on the bottom.) Then she mounted the shelf above the TV. For the curtain, she sewed small elastic loops onto the top of a piece of fabric, which could hang from screws inside the shelf. She also sewed a dowel into a bottom pouch to add weight to the curtain—and make it easier to roll up for movie night.

Get Playful With Your Cords

squiggle cord on a sconce in a bedroom
COURTESY OF KRYSTLE PERKINS

Blogger Krystle Perkins, who lives in Dallas, bought two bedside sconces with thick black cords. She didn’t want to pay an electrician to wire them, so she got creative. “I had an aha moment,” she says. “What if I viewed the cords as an extension of the fixture itself and had fun with it? ”She used heavy-duty double-sided tape to adhere the cords to the wall in squiggly lines, hot-gluing the switches right to the headboard so she could easily access them. Now the cords look intentional! Oh, and the whole project took less than 30 minutes.

Spice Up Your Grout

hot pink grout on kitchen tiles
COURTESY OF ALLANN ARNOLD

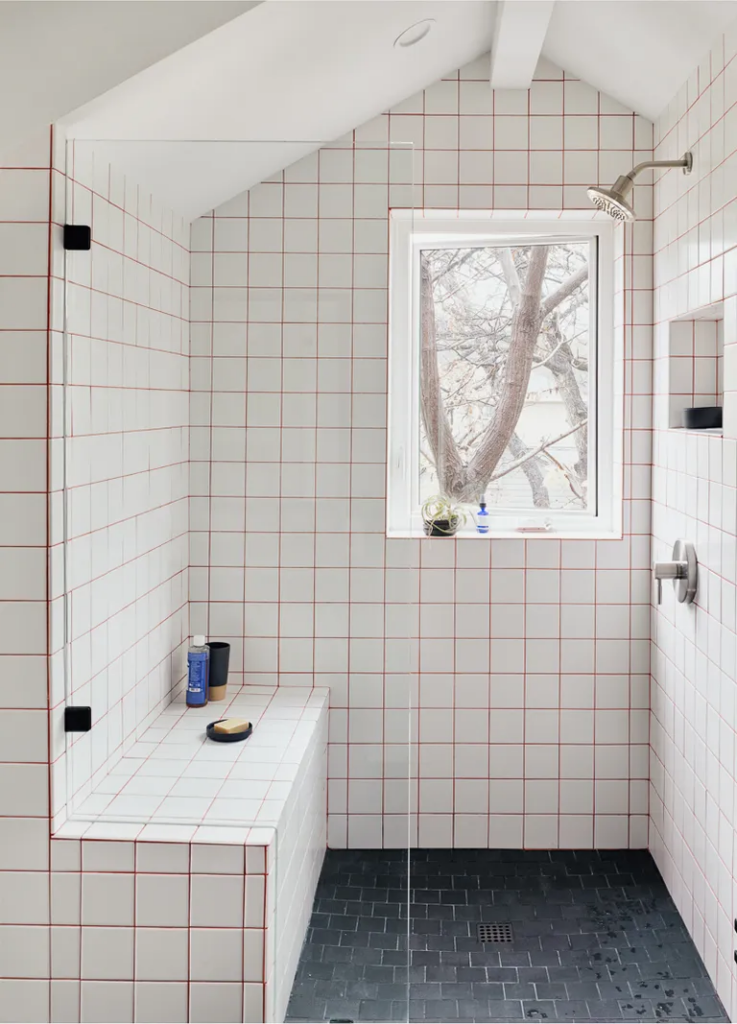
Grout is not the sexiest thing in your home. (That’d be you!) But people have been playing around with it lately, swapping out the typical white or gray stuff for colourful or sparkly grout. Allann Arnold, owner and principal designer at Hollace Homes (@hollacehomes) in Wimberley, Texas, went with bold magenta around the simple white tiles in this laundry room. While she had hers custom made to match the paint colour on an accent wall (Exuberant Pink 6840 by Sherwin-Williams), you can shop for ready-to-go options at hemway.com.

Paint an Outdoor Mural

mural on patio
COURTESY OF LIZ RISHEL

Fact: Even if you’re not all that artistic, you’re still capable of painting a mural! Liz Rishel projected a design onto an exterior wall of her home in Orlando, Florida. Then she traced each section with chalk in colours similar to the paint colours she’d ultimately use—to remember which was going where. She suggests applying two coats of outdoor paint and grabbing a one-inch brush for crisp edges. A three- or four-inch brush is good for filling in the larger areas. Now go forth and release your inner Keith Haring!

Limewash Your Walls

lime washed wall in bedroom
COURTESY OF ALEXANDRA GATER

For walls that give off old-money vibes, try a mineral paint limewash. Alexandra Gater used the technique to create a textured feature wall behind the bed in this Toronto home. “I love using limewash paint because you don’t need to be precise, which makes it super easy,” she says. Here’s what she thinks you need to know:

  • Limewash can come ready-to-use or as a formula that needs water mixed in. Go for the latter. “Adding water will alter the colour of the limewash, but it gives it a beautiful watercolour look, and I like having control of the dilution,” Gater says. She chose a cool teal shade called Moonstone from the paint brand Pure & Original. Another suggestion: Portola Paints.
  • Use a limewash block brush, which has denser bristles than a regular paintbrush. Because limewash is on the watery side, you need a brush that will hold a significant amount of it. The Limewash Block Brush ($25; bauwerkcolour.com) is a good one.
  • Gater says that applying limewash is like painting a giant piece of freehand art. Use an X motion to create organic strokes. And don’t worry about making your strokes uniform, she adds. Limewash is meant to look imperfect.
  • Two coats should do the trick—if you add more than that, you’ll lose the variation in shades, and the wall will look less textured.
  • Don’t panic if your wet paint looks much darker than you were expecting. Limewash lightens as it dries!

Add Crown Molding

crown molding
COURTESY OF HATTIE KOLP

Though her 1890s New York City apartment had tons of character, Hattie Kolp felt it was sorely lacking in the crown molding department. So she ordered lightweight urethane trim with a leafy pattern (Palmetto 3 3/4″ Crown Moulding, from $49.50; ekenamillwork.com), rented a 12-inch miter saw and an 18-gauge brad nailer from The Home Depot, and brought in a helper from TaskRabbit to handle the tricky cuts (old buildings tend not to have straight walls). There were some tense moments, but Kolp remembered the mantra, “A little caulk and paint make it what it ain’t.” Once the final touches were done, everything blended in seamlessly. “The molding is the icing on the cake of my Parisian-inspired apartment,” she says.

Build Some Wine Storage

wine storage
COURTESY OF ZOE HUNT

No wine cellar? No problem! Zoe Hunt turned an empty cabinet in her Durham, North Carolina, kitchen into a wine rack using oak plywood. She cut boards to fit her cabinet’s dimensions and ironed on edge banding (wood tape) to cover outer facing sides and make the pieces look like solid wood. Next, she used a jigsaw to cut grooves halfway through the boards, allowing her to slide them together like a 3D puzzle. After that, she nailed more boards to the back and sides of the gridded pieces to create a box. To finish her project, she coated the wood with Minwax Rustic Beige Stain ($13 for 1 qt.; lowes.com), placed the rack in the empty cabinet—and opened a bottle.

For more DIY ideas and tips see the full article HERE.

Source: Get It Done: 15 DIY Projects To Upgrade Your Home on a Budget (realsimple.com); By Erica Finamore and Hannah Baker | Published on April 16, 2024

Interior Design Trends for 2024

a bathroom with a sink and a mirror
READ MCKENDREE

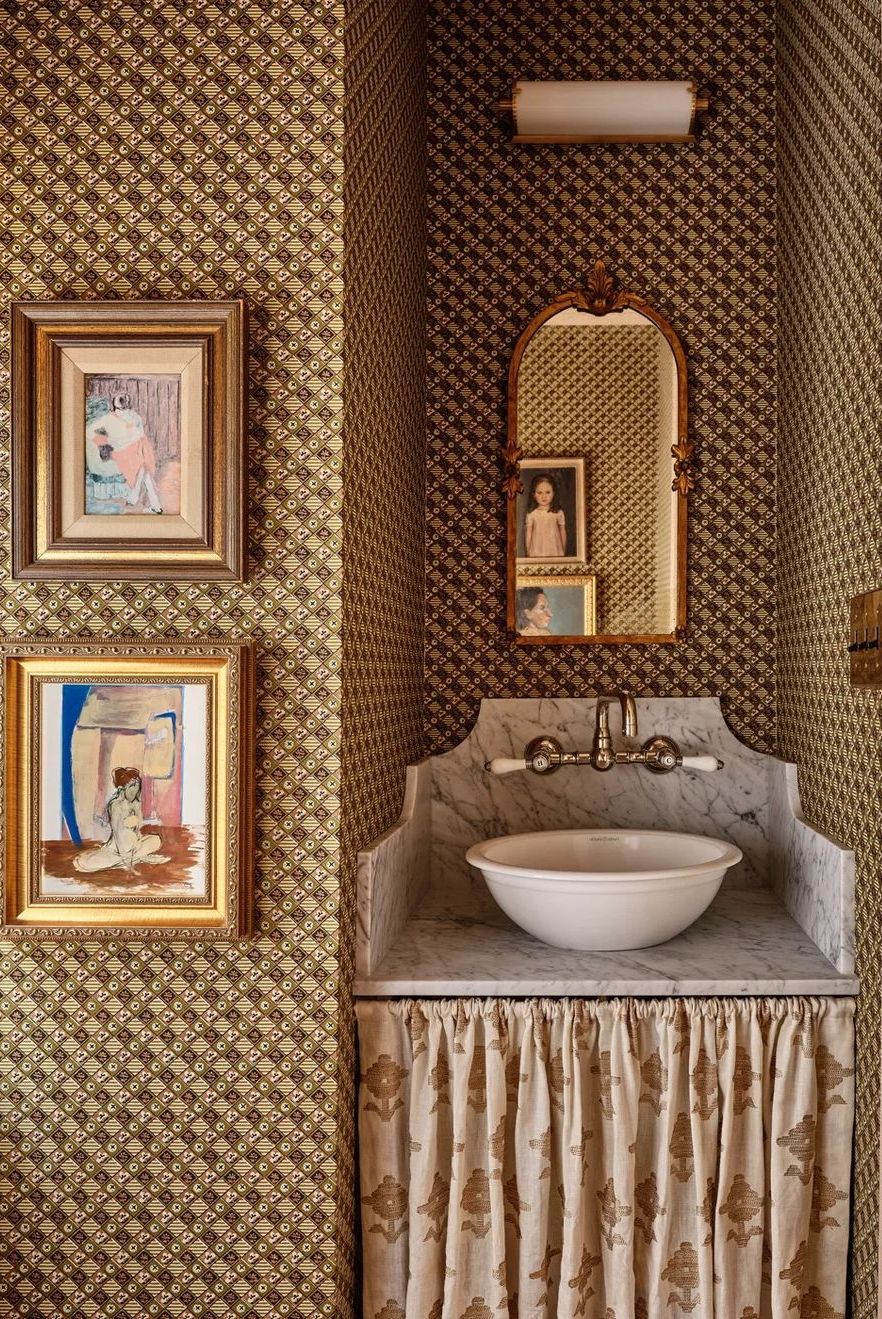
Brown Renaissance

“For 2024 we will continue to see designs trending out of grays and into browns. Not only will this be seen in fabrics and textiles but also in cabinetry and casegoods,” says Next Wave Designer DuVäl. This wave of chocolate neutrals has also been noted by a survey on design trends the New York Design Center conducted. Over 90 percent of respondents predict that brown will be the colour of choice in 2024. Here, designer Katie Rosenfeld painted the trim and ceiling in Setting Plaster by Farrow & Ball, what she calls a nude pinky tone to offset the browns and olives in this bathroom’s Michael S. Smith wallpaper.

a black and white photo of a bedroom with a black chair and a desk with a lamp andHANNA GRANKVIST

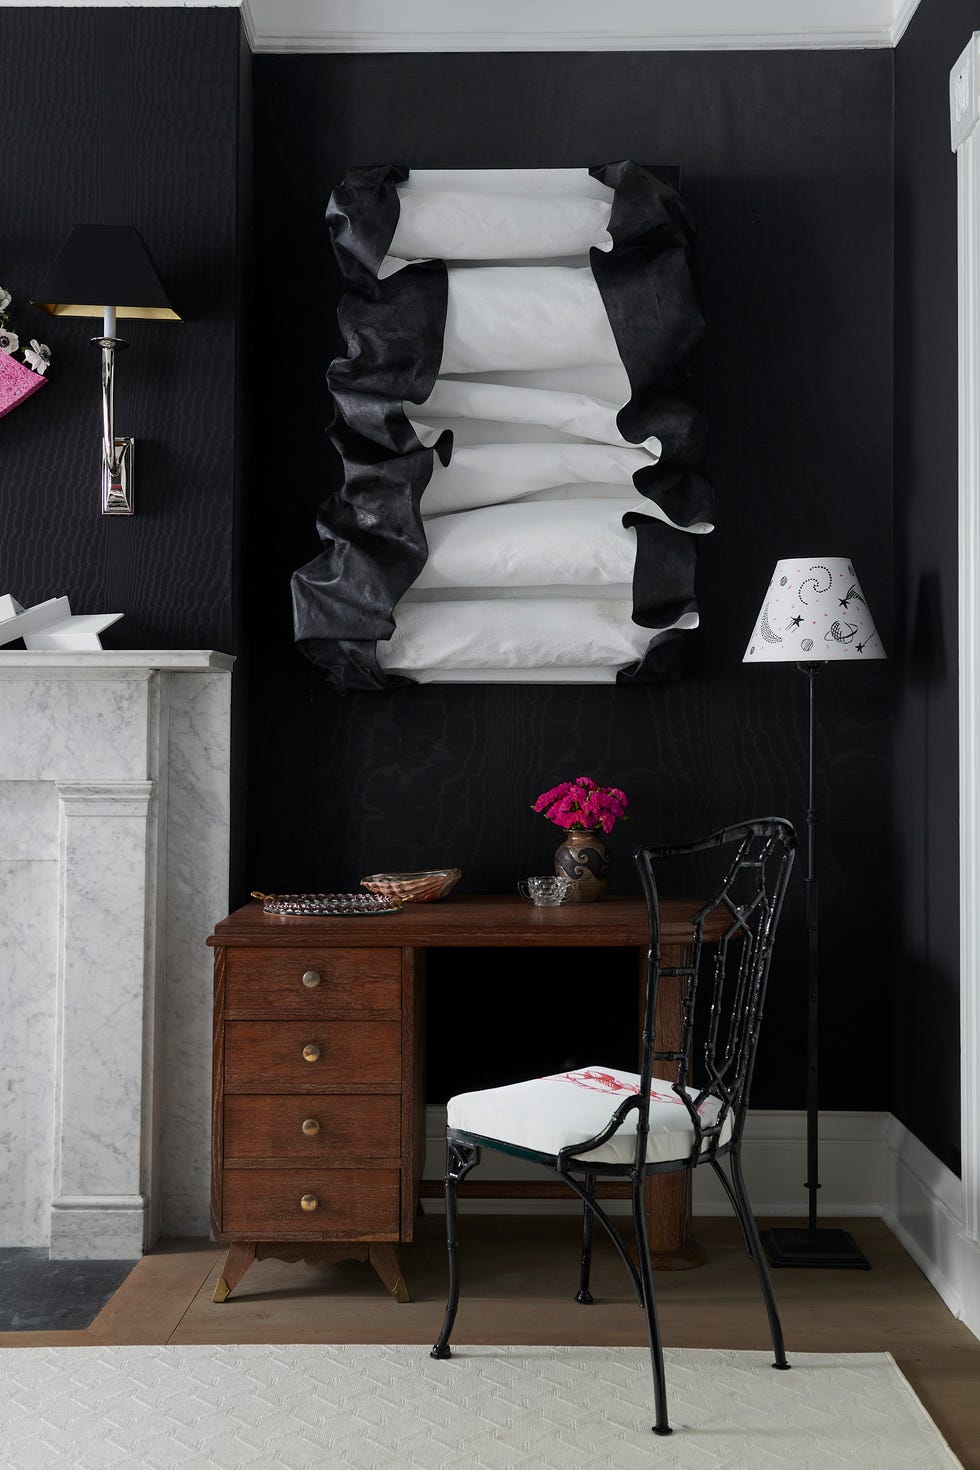
Sculptural Art

“Wall-mounted sculptures offer so much depth and dimension. Prints behind glass can feel so flat. I like to mix artworks in a variety of finishes, textures, and shapes,” designer Tara McCauley explains. She also notes that the work of creating an attractive “Zoom background” for your colleagues to see is just as important as having a beautiful view when you’re facing the computer. McCauley brings inky dark walls to life in this hardworking corner with a black and white sculptural piece above the desk. It’s a blank slate for your ideas to come to life!

a kitchen with a table and chairsRYAN DYER

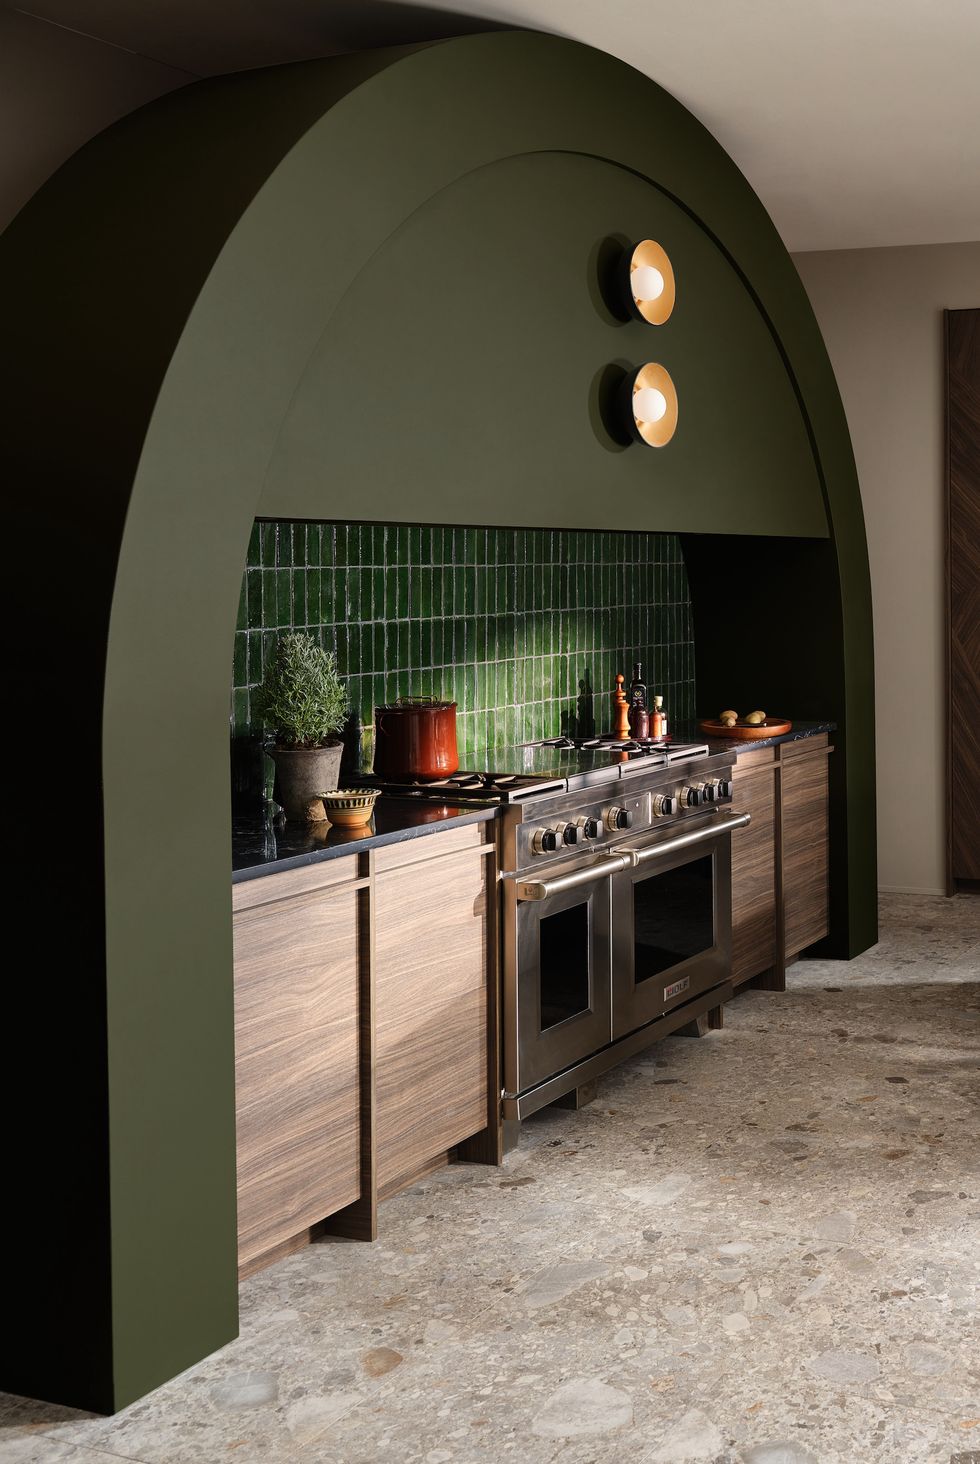
Dynamic Range Hoods

“Hood vent covers often fall to the back burner during the kitchen design process, but I anticipate a greater focus on them in 2024. We will see bolder designs incorporating distinct textures on the hood, like plaster or wood fluting. I always like to pair a dramatic hood vent with a beautiful eye-catching range, like the iconic models offered by Wolf,” says New York City-based designer Hilary Matt. Here, a deep olive green hood is the center of attention. The design of this unit is contemporary, masking itself in the heavy industrial look found in most kitchen hoods.

a large white tub in a bathroomCHRISTOPHER STARK PHOTOGRAPHY

A Pause From Technology

“What I think will be a big turnabout in design for 2024, is that more and more of my clients are actually wanting to return to ‘dumb homes’ at least that’s what I’m calling the opposite of a smart home! Harsh blue lights and bright touchscreens that illuminate when you walk by at night are starting to give way to a love of mechanical controls: old-school buttons, switches that toggle up and down, and simpler toilet washlets!” says Nozawa. Self-care sessions in the bathroom can have a refreshing start without the buzz of tech. This bathroom window invites nature in as you start your day renewed and focused.

a kitchen with a shelf full of books and a tea potMARC MAULDIN

Bold Colours

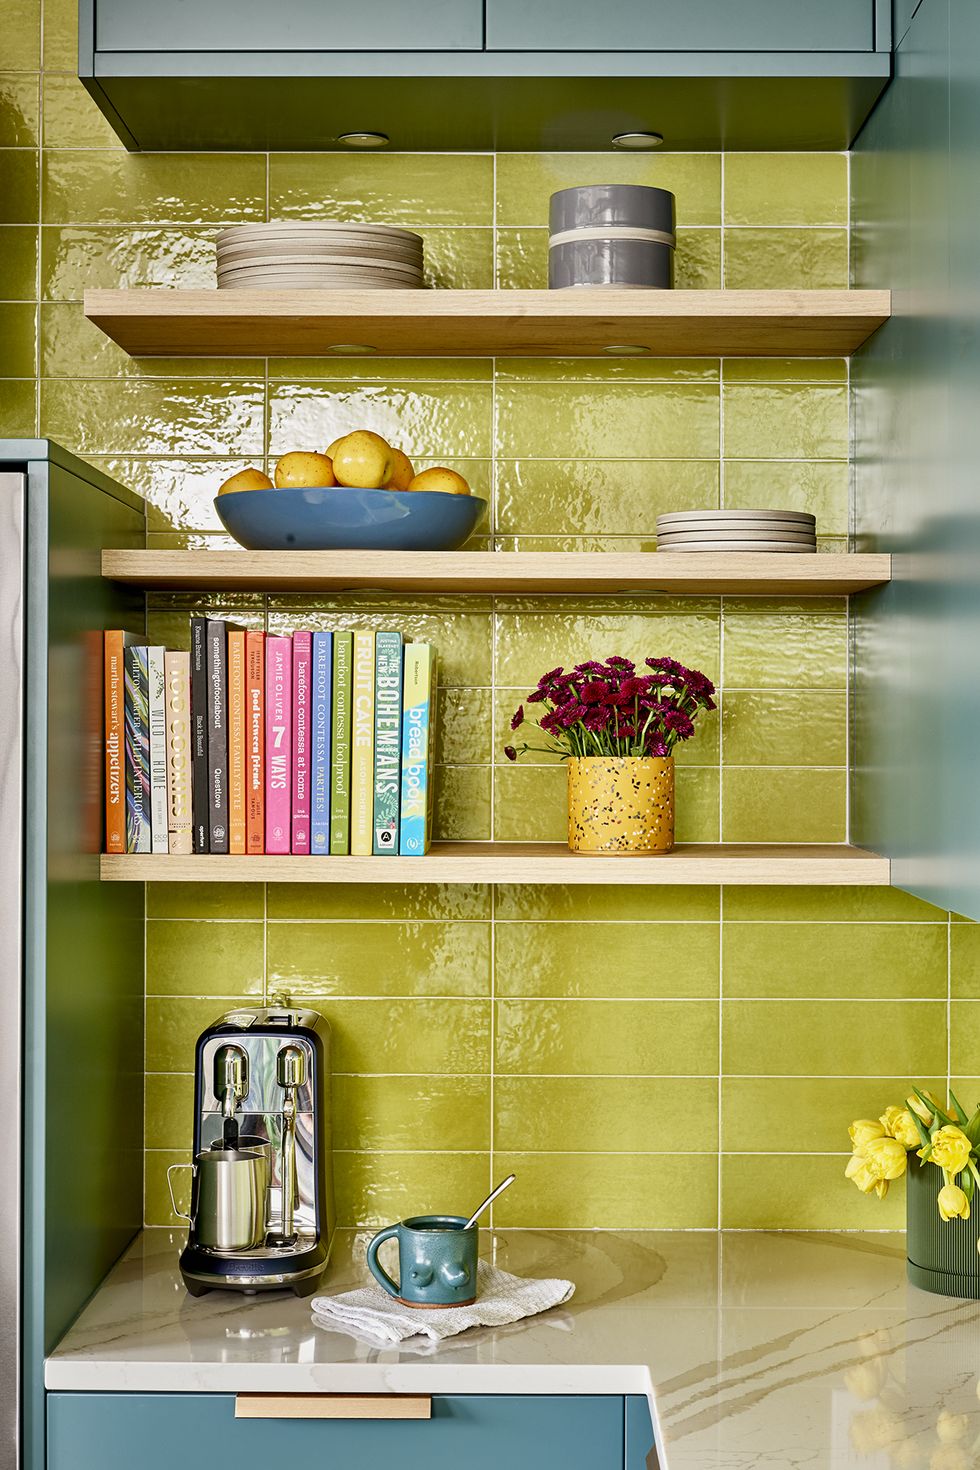
Leah Alexander of Beauty is Abundant says this will be the year of investments in vibrant and audacious colour choices. “I see the appeal of gray and white kitchens and endless beige bouclé tapering off in favor of vibrance, saturation, and increasingly edgy colour combinations,” says Alexander. “While I’m still obsessed with zellige tile I’m seeing stronger staying power in simple shapes in unique hues.”

a staircase with a table and chairsANDRE HILTON

Surprising Murals

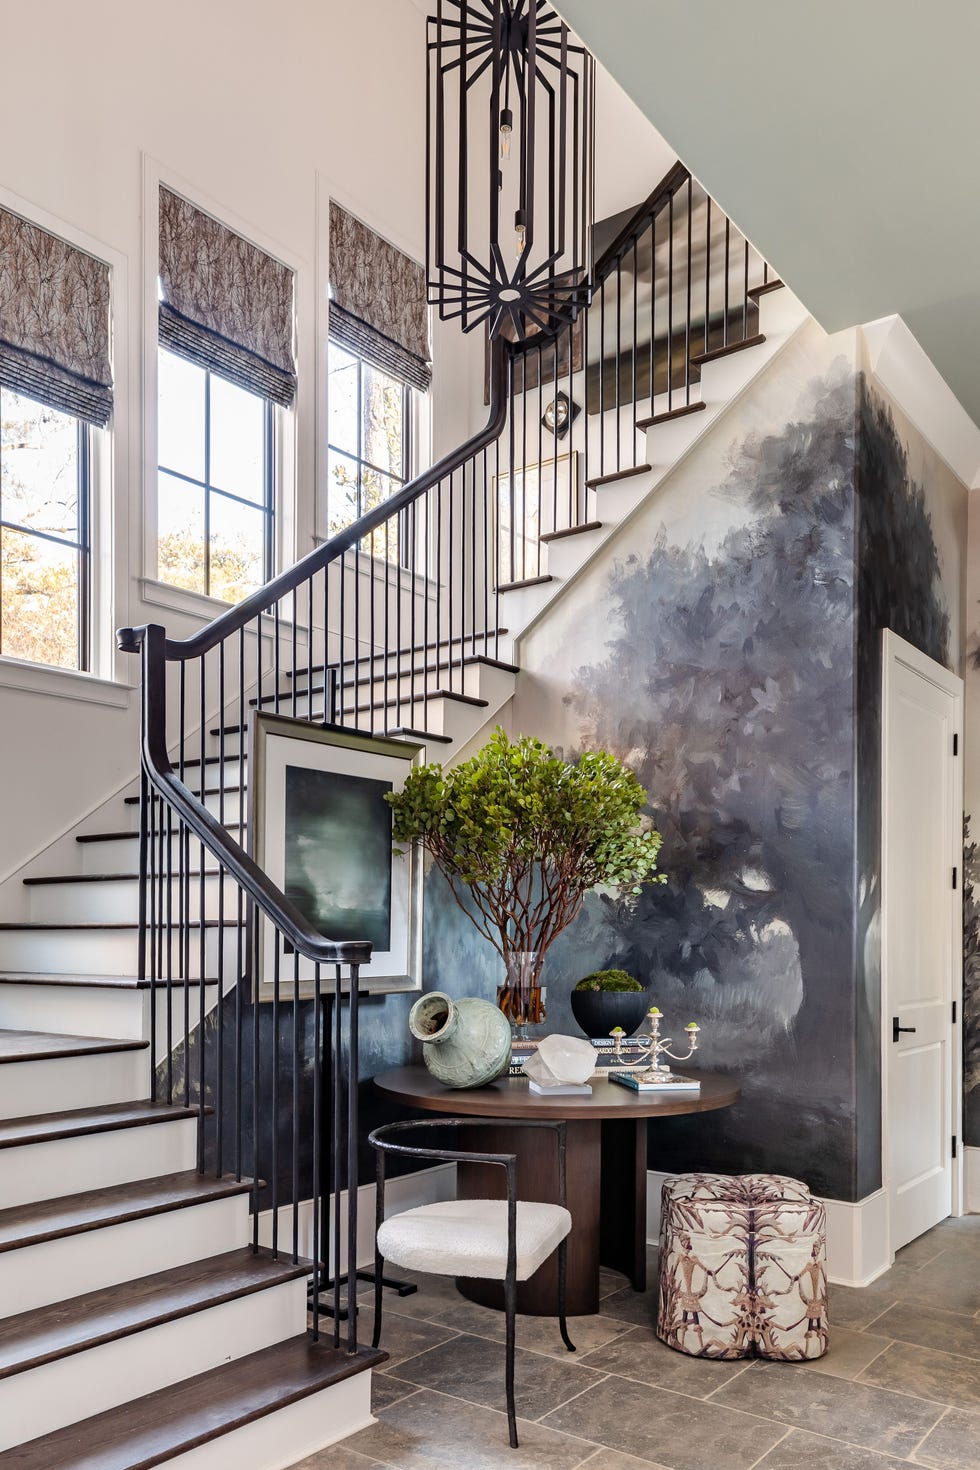
Take your home’s design to the next level! Often ignored but frequently used, your stairway is the perfect place to hint at the beauty to come within your home. Take note of this stairway designed by Andre Hilton of Jordan Hilton Interiors that adds intrigue to the walls. “You will start to see murals appear in unexpected places such as foyers and stair halls,” Hilton says. “No more boring, neglected stairwells. They deserve just as much attention as any other room in the house. It should definitely be a journey from one floor to the next, and this trend is sure to make people fall in love with every inch of their home.”

a room with a mirror and chairsJUSTIN CHUNG

Innovative Materials

Design duo Joel Wong and Amanda Gunawan of OWIU Design anticipate a rise in sustainable materials in both design and building. Think unique pieces like seaweed lamps, features made out of mycelium, or Japanese shikkui plaster made out of natural seaweed fibers. While designers and homeowners have been open to more intentional sustainable choices, next year will become an overarching goal.

a living room with a fireplaceJASON VARNEY

Inviting Living Rooms

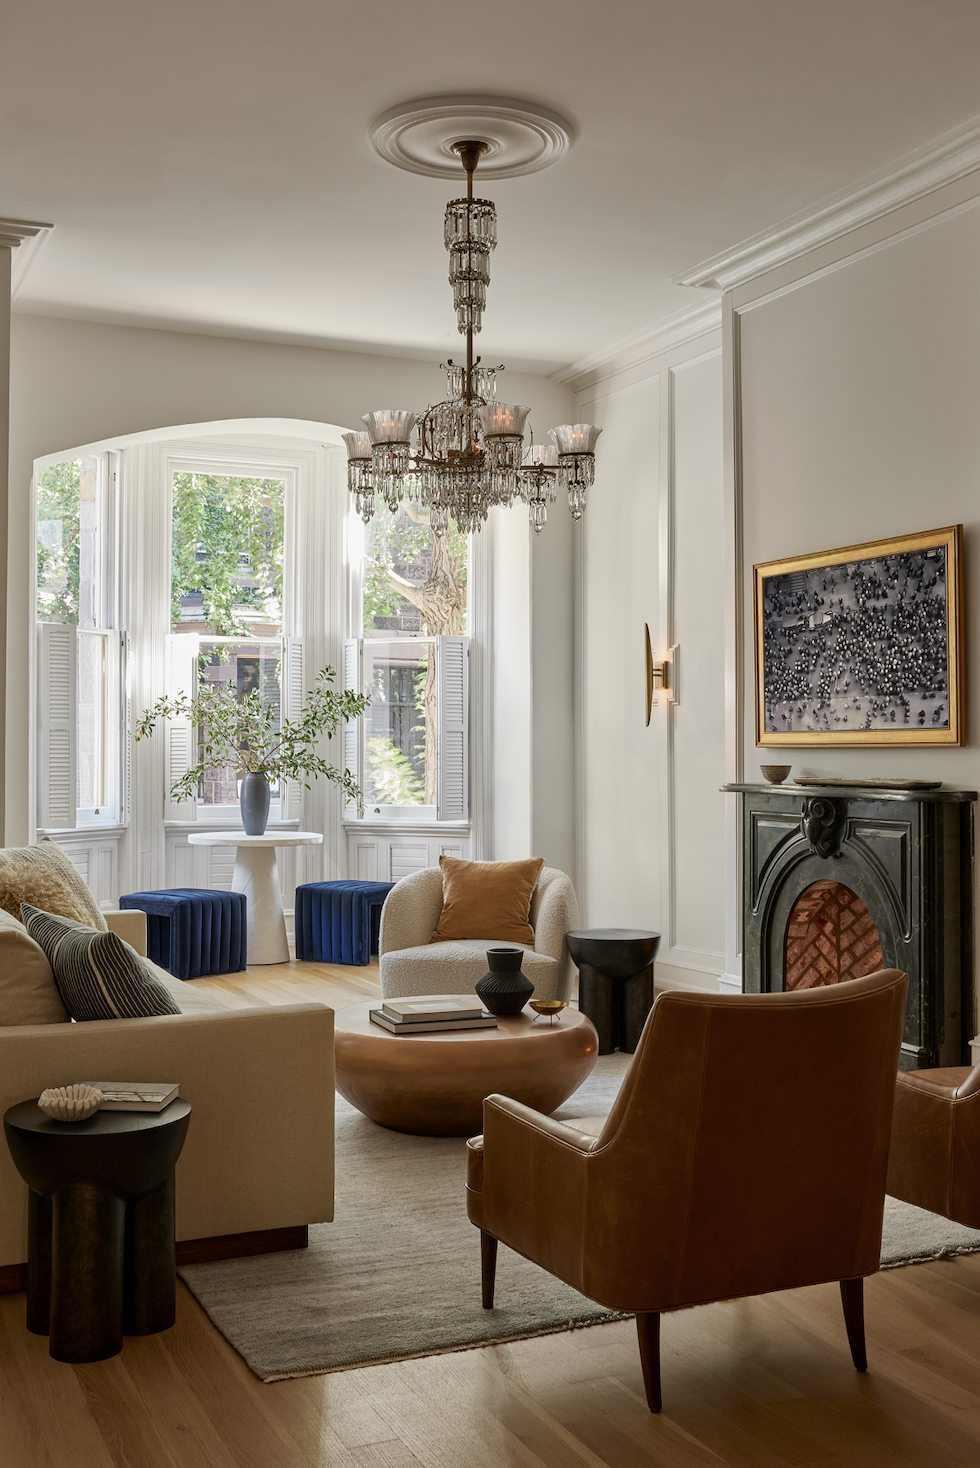
So long to cold, white living rooms! Embrace a living room you can actually enjoy without worrying about accidental wine stains. Alexis Pew of Kaminski + Pew shares, “Minimalism, but it’s evolved into a look that is less rigid for a more organic and inviting feel. Warm, textural spaces with natural materials in moodier, earthy colour palettes. We’re moving away from bright whites and grays toward more creams, browns, rusts, and muted greens.”

a bathroom with a tub and toiletJACOB SNAVELY

Personalized Eclectism

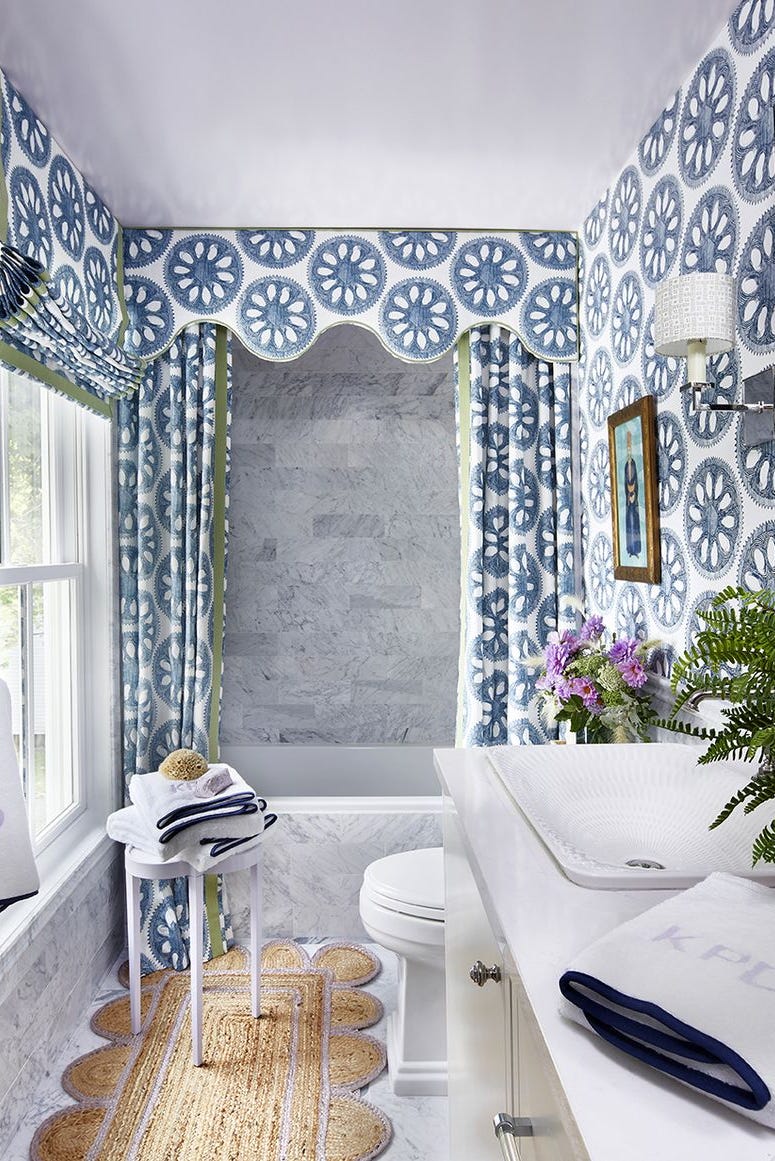
According to designer Kerri Pilchik, 2024 will be a year of putting decor with character and stories first. “I think in 2024 we are going to see more highly personalized spaces and rich colour palettes,” Pilchik shares. “Interiors will be more eclectic as people use antiques and pieces that have been passed down from family alongside new pieces that range from bespoke to CB2.” In line with the uptick we’ve seen in antique and vintage shopping, homeowners have the desire to create a connection to their past. This pattern-clad bathroom cleverly displays a colourful and layered personality, from the scalloped shower curtains to the monogrammed towels.

a living room with a glass wallCHAD MELLON OF STUDIO MELLON

Cozy Quiet Luxury

“Maybe it is the ‘quiet luxury’ effect, but I anticipate a trend toward relaxed and casual luxury, specifically when it comes to furniture,” says Jen Samson of Jen Samson Design. “Clients will lean more towards comfortable, lived-in furniture rather than smooth clean, and sterile looks.”

For the full article and more trends please click HERE.

Source: 2024 Interior Design Trends That Will Be Everywhere Next Year (housebeautiful.com) BY MEDGINA SAINT-ELIEN | PUBLISHED: DEC 9, 2023

7 examples of 2024’s First Major Design Trend: Bookshelf Wealth

1. REFLECT WHAT YOU LOVE WITH YOUR BOOKSHELVES

(Image credit: Julie Soefer)

‘Bookshelves are a beautiful way to display things that are important to a homeowner. Whether it is items from travel, inspirational books or stunning artwork, a bookshelf is a great place to incorporate meaning within a space,’ says designer Marie Flanigan. ‘In this case, we worked with Chef Ludo Lefebvre to fill his gorgeous built-in with his cookbook collection. His collection is extensive but important to his work, so we made sure that the books were accessible and mixed in a few other meaningful pieces to break up the space.’

2. CONTRAST A MINIMALISM WITH A COZY READING ROOM

(Image credit: Alexander James)

‘A well-curated library or bookcase weaves warmth and personality into a home, transforming a space into one of comfort and charm. By displaying books alongside personal treasures and decorative objects, it reflects the unique personality of its inhabitants, creating an inviting atmosphere,’ explains Thomas Cox, founder of HÁM Interiors. ‘In our Hideaway project, we wanted to create a useful and distinct space from the adjoining living area. Moving away from the home’s previous minimalist aesthetic, we introduced floor-to-ceiling joinery and a traditional fireplace with reclaimed brick. A choice of moody paint for the walls and woodwork added depth and character.’

3. LEAVE SPACE TO CREATE VIGNETTES

(Image credit: Julie Soefer.)

‘Styling a bookshelf takes patience, but when done well, establishes an elegant sophistication. I like pairing books of similar size and color to illustrate a streamlined flow. Lastly, I will fill in any holes with items of personal significance or hang small pieces of art for an unexpected surprise,’ explains designer Kara Childress. The bookshelf wealth trend is of course firstly about the books, but you’ll also notice the odd piece of decor or artwork interrupting the rows of colorful spines. These allow space to bring in meaningful pieces, pieces that in a minimalist-ruled time not so long ago would be called ‘knick-knacks’ but now are a key part of this look. When curating your shelves start with the books but do leave the odd negative space to break them up and create little vignettes.

4. COVER THE BACKS OF BOOKCASE WITH WALLPAPER

(Image credit: Elizabeth Hay Design/Matthew Kissiday)

This is a great trick for adding even more character to a bookcase, especially if you aren’t a book hoarder but still want that very maximalist look that bookshelf wealth is about. By adding a wallpaper to the back of a bookcase you already have an interesting base to start from, you can leave gaps without the shelves ever looking bare. ‘We love to cover the backs of our bookcases in a small-scale wallpaper to make them pop and add interest: this is particularly effective if you don’t have a huge collection of books as it doesn’t matter if the bookcase is full or not,’ explains designer Elizabeth Hay. We always love to have some cute little library bookcase lights with shades which adds further detail and soft lighting in the evenings.’

5. BLEND OLD AND NEW WITH THE CHOICE OF BOOKS AND COLORS

(Image credit: Albion Nord)

‘For this living room, Albion Nord, a design studio known for its expertise in blending traditional and contemporary styles invited Ultimate Library, the bespoke book company to collaborate with them on the library at Benham Park; a former call center that they were transforming back into a period house, albeit with a contemporary twist.’ explains Philip Blackwell, a book curator and founder of Ultimate Library. ‘Gone, are the serried ranks of dark leather-bound books. An in comes a more contemporary book selection of varying heights and shades, more casually shelved. And mixed with objects that give it a much more informal look. The book content gives it the gravitas and authority, the pale tones of some books, lift and lighten for effect.’ ‘It is as if the old family home has been passed onto the next generation who have injected their contemporary twist.’

6. BRING BOOKS INTO MORE PRACTICAL ROOMS

(Image credit: Barlow & Barlow)

This kitchen designed by Barlow & Barlow proves that a bookshelf works just as well in practical spaces. It’s a huge (and very timeless) kitchen trend for kitchens to no longer look like a kitchen but be softer spaces, more like a living room, and adding in a bookshelf is a really simple starting point this achieve this style. Adding in a bookshelf is also a nice way to blend spaces in an open-plan room. Cookbooks are an obvious choice, however, mix in other books to to add more character and interest. And you can introduce some more ‘kitcheny’ items too like jars and crockery if you want the shelves to double as kitchen storage.

7. CREATE THE PERFECT ROOM DIVIDER

(Image credit: Bethany Adams Interiors)

‘With a combined five degrees between them, these clients made it clear from the beginning that their beloved book collection was going to play an integral role in their redesigned home,’ explains Bethany Adams. ‘Positioning the new floor-to-ceiling bookcase between the living room and the family room allowed for a wonderful continuity of the color scheme as it is unified by the rainbow of spines between the two rooms. Additionally, the new library wall hides a secret: pocket-reeded glass doors that can close the two rooms off when one partner is more in the mood for reading, and the other wants to watch TV.’

For more articles on Bookshelf Wealth check out these articles HERE and HERE.

Source: 7 examples of Bookshelf Wealth that are nailing this timeless trend | (homesandgardens.com) BY HEBE HATTON PUBLISHED February 2024; Why “Bookshelf Wealth” Is 2024’s First Major Design Trend | Architectural Digest; What is bookshelf wealth? Everything you need to know | Real Homes

2024 Colours of the Year

1. RENEW BLUE BY VALSPAR

(Image credit: Valspar)

Described as a ‘new neutral’, Valspar’s 2024 colour of the year is Renew Blue. The shade is an uplifting blue that includes hints of grayish sea green and is all about well-being and restoration. With strong references to nature, the shade is instantly relaxing and aims to be used throughout the home, whether as a primary or accent colour, to create a restorative and balanced environment. 

2. PERSIMMON BY HGTV HOME, SHERWIN-WILLIAMS
(Image credit: HGTV Home by Sherwin-Williams)

For 2024, HGTV Home by Sherwin-Williams revealed Persimmon as its colour of the year, alongside a 10-shade 2024 colour collection called Renewed Comfort, designed to encourage tranquility and rejuvenation. Persimmon is an earthy terracotta colour that again, promotes comfort in the home and provides a pop of energetic colour whilst maintaining a soft look. 

3. CRACKED PEPPER BY BEHR

(Image credit: Behr)

Cracked Pepper was announced as the 2024 Behr colour of the year for the California-based paint company. A soft black shade that is prized for its versatility, the colour was designed to capture the warming and comforting effects associated with dark colours in the home. With a signature elegant look, Cracked Pepper allows homeowners to create sophisticated spaces that feel equally inviting and relaxing, perfect for rooms such as cozy living room ideas. 

4. LIMITLESS BY GLIDDEN

(Image credit: Glidden)

Glidden’s 2024 colour of the year is Limitless: a warm, honey-toned neutral shade. The fresh colour is highly versatile by perfectly balancing the understated nature of neutrals whilst also bringing a pop of primary colour to the home. Limitless has been crafted carefully to work well across many interior styles, and can be used to make a loud statement as much as it can create a calming backdrop in the home. 

5. IRONSIDE BY DUTCH BOY

(Image credit: Dutch Boy Paints)

Ironside, a deep olive shade, claims the title of Dutch Boy’s 2024 colour of the year. Responding to the rising popularity of deep shades in the home, Ironside balances both sophistication and comfort. Ironside also links to nature, creating an organic feel in the home that is a great choice for creating a timeless space, such as dining room ideas.

6. BAY BLUE BY MINWAX

(Image credit: Minwax)

Bay Blue, announced by Minwax is a wood stain, falling somewhere between a green and a blue. Designed to enhance natural wood throughout the home, Bay Blue aims to propel homeowners to get creative and use the shade to elevate spaces – or furniture items – with its uplifting hue. The stain works well with warm-toned wood as well as copper, and perfectly complements decorating with vintage, as well as translating well to more modern spaces. 

7. UPWARD SW 6239 BY SHERWIN-WILLIAMS

(Image credit: Sherwin-Williams)

Sherwin-Williams unveiled a versatile blue hue as its 2024 Colour of the YearUpward SW 6239, that can be used across a wide range of interior styles. Inspired to create spaces that feel relaxed and welcoming, the new colour aims to promote a peaceful feel in residential projects. Opt to use the colour on all four walls of a room, or for a more reserved introduction of blue into the home, you can use the calming colour to decorate furniture pieces. 

8. ANTHOLOGY COLLECTION BY SHERWIN-WILLIAMS

(Image credit: Sherwin-Williams)

Offering a colour trend report in addition to its Colour of the Year, Sherwin-Williams launched Anthology: a collection of 48 hues for 2024. Divided into four key colour families: blues and greens, reds and purples, deeps and darks, and delicate tints, the collection is all about boosting well-being in the home. Balancing vibrant hues with understated neutrals, the selection collectively acts as staple colours for the home that create warming and relaxing spaces that inspire personality. 

9. SWEET TREATS BY LITTLE GREENE

(Image credit: Little Greene)

Little Greene’s newest colour palette is titled Sweet Treats, and it’s all about replicating the rich and indulgent shades associated with iconic desserts. A collection of nine new hues, each tone is a fresh take on neutrals that feels instantly warming and sophisticated. Thanks to the collection’s timeless colours, they are ideal for multiple uses in the home, whilst their richness makes them perfect for creating cozy fall colour schemes. 

10. VIRIDIS BY GRAHAM & BROWN

(Image credit: Graham & Brown)

Interior brand Graham & Brown announced its colour of the year for 2024 as Viridis, a soft and earthy shade of green. Designed to create restful and restorative spaces in the home, the new hue takes reference from nature and promotes an organic look. Not only did Graham & Brown unveil a colour for the year ahead, but also its design of the year: New Eden, a green-toned forestry print that pairs beautifully with Viridis and is available as wallpaper, curtains, and blinds. 

11. BLUE NOVA BY BENJAMIN MOORE

(Image credit: Benjamin Moore)

Benjamin Moore’s newly unveiled Blue Nova is a unique colour for 2024; a mid-tone blue that has warm violet undertones to it. Centered around the core theme of juxtaposition, the new hue is inspired by the night sky and has an intriguing mystical feel to it. Colour experts at Benjamin Moore suggest that this new blue is versatile to be used throughout different rooms in the home and is a more adventurous take on classic navy shades. 

12. PEACH FUZZ BY PANTONE

(Image credit: Pantone)

Pantone’s Colour of the Year for 2024 was unveiled as Peach Fuzz, described as a ‘warm and cozy’ peach shade. Unlike the occurring theme of darker, moodier colours that have somewhat dominated 2024 colour trends, Peach Fuzz establishes a more vibrant, playful trend. While it’s fair to say opinions on Peach Fuzz have been divided, we’re intrigued to see how homeowners and interior designers decide to channel this standout colour this year. 

For the full article click HERE and for more colours of the year click HERE

Source: 2024’s Colors of The Year: 12 newly launched paints | (homesandgardens.com) By EMILY MOORMAN | January 2024; Every 2024 Color of the Year We Know So Far (bhg.com) By Emily VanSchmus and Caitlin Sole | December 7, 2023

What’s the best room to renovate first? Experts share their knowhow

START WITH THE KITCHEN

(Image credit: K Kong Designs Photograph: Mali Azima)

A kitchen remodel is a great first step in a home renovation, according to the experts. ‘Kitchens are a wonderful place to start when prioritizing a full home renovation,’ says interior designer Kristin Kong of K Kong Designs. ‘They often require the most time and carry a larger portion of the budget. The heart of the home, gathering spot, drop zone, and entertaining area, a kitchen is the room used most often therefore starting here is a smart option. Changes in cabinet layout and island configuration can impact flooring decisions which is another benefit of having a kitchen remodel planned before starting other portions of the home. ‘Custom hoods or high-end appliances can be budgeted for to ensure these impactful design elements make the design plans. Open to the majority of the main level of the home, color palettes utilized in the kitchen will flow into all the major living spaces.’

Chad Hackmann, regional partner at Alair Homes Arlington, which provides custom homes and remodeling, agrees that the kitchen can be a good option. ‘When considering which room to renovate first, the kitchen often takes precedence due to its central role in daily life – meal prep, entertaining, eating, and socializing,’ he says. ‘It is also well documented that the kitchen gives the highest return on renovation investment.’

THINK FLOORING

(Image credit: Aimée Mazzenga)

One way to approach the question of what’s the best room to renovate first is by considering the flooring, according to Thomas Borcherding, lead designer and owner of Homestar Design Remodel. However, you may well end up with the same starting point of the kitchen. Here’s the reason. ‘From my experience, you should first identify whether or not new flooring will be run continuously throughout the floor plan,’ says Thomas. ‘If you are running new flooring throughout the home, and it will run into the kitchen, then the first room that you should renovate is your kitchen. This is because new base cabinetry will likely change your kitchen’s floor plan, requiring new flooring.’

GAUGE QUALITY

(Image credit: Julie Soefer)

There’s an alternative approach you might wish to take on the best room to renovate first if you haven’t worked with a particular professional before. ‘When working with a contractor or installer for the first time, you may wish to begin with the least intensive remodeling project,’ suggests Thomas Borcherding. ‘Doing so can allow you to gauge the quality of your remodeler prior to committing to your large projects.’

GO TOP DOWN

(Image credit: Future)

Strategic planning is necessary for a major remodel, and you might like to work in a tried-and-tested way. ‘It’s typically best to renovate from the top down and the outside in,’ advises Chad Hackmann. ‘For example, if you have an unfinished basement that you want to address first but also know you want to do a major update to the kitchen or bathrooms someday, you want to create a master plan to understand how working in one area will impact another. ‘If you do the basement first, then the kitchen or upstairs bathrooms later, and don’t plan properly, you may have to do more work in the basement later to account for moving plumbing, electrical, and/or the HVAC. 

‘Similarly, if you want to replace your vinyl siding while knowing you need to update the windows, you may want to wait and do it all at once so it is more cost-effective and a less disruptive project in the long run.’

CONSIDER RENO EXTENT

(Image credit: Nathan Schroder Photography/Urbanology)

How much you are doing to each room should also count in your plan of action. ‘Minor kitchen or bathroom updates, meaning new appliances, new cabinets, new sinks, and new countertops that are returning to the same place they were (a pull and replace), might precede a basement overhaul if they don’t interfere with the infrastructure,’ says Chad Hackmann. ‘Yet major changes involving plumbing or electrical relocation may necessitate a comprehensive approach. It’s like I always say – if you are going to move the toilet a few inches, it probably requires a totally new plumbing run, so you might as well move it to where you want.’

FACTOR IN DISRUPTION

(Image credit: Caitlin Kah Interiors / Carmel Brantley)

Planning to stay in the house while a renovation is taking place? You might be tempted to start in the kitchen to get this major disruption over with. But Chad Hackmann advises weighing up the consequences of staying put for the duration at all. ’The first thing you have to ask yourself is what your realistic tolerance for chaos is,’ he says. ‘Do you need things neat? Do you hate dust anywhere in the house? Then you should not live there while work is going on. That said, a typical kitchen renovation that requires moving walls, plumbing, and electrical will take more than six weeks and probably nearly three months. The amount you save in rent could get you that bigger, better range or fridge you’ve been eyeing, so it might be worth a little chaos.

‘Additionally, if you do choose to live in the home during renovation, expect the timeline to be extended and the cost to increase,’ he says. Thomas Borcherding advises: ‘During a kitchen remodel, my clients make heavy use of toaster ovens and air fryers. They also dine out quite regularly. During bathroom remodels, my clients will either use their spare bathroom or utilize a gym’s shower if there is no spare bathroom.’

Take time before embarking on a renovation. ‘Step back and think about your long-term goals and make a master plan that includes all the rooms you want to eventually renovate before you start tearing into one,’ advises Chad Hackmann. And be mindful to follow the six steps for renovating your home to ensure the project goes smoothly whichever rooms your project involves.

Source: What’s the best room to renovate first? Experts share their knowhow | (homesandgardens.com) BY SARAH WARWICK | PUBLISHED December 2023

Dramatic design Ideas for your Ceiling

1. Make A Grand First Impression 

(Image credit: Kara Childress)

A vaulted ceiling can make for a beautiful and striking first impression as people step foot into your home. As shown in this entryway by Kara Childress, the beamed, vaulted ceiling enhances the rustic, cabin-decor style. This vaulted ceiling greets you with the warmth and texture of wood, instantly showing you as you enter into this home the rustic style and materials that will be used throughout. The beams on this vaulted ceiling also add shape and structure to the space, helping to lead and guide you through the entryway through a stylish, symmetrical design – a great look for beamed ceiling ideas.

2. Unite A Vaulted Ceiling With A Feature Fireplace

(Image credit: Jessica Bennett of Alice Lane Interior Design, photography by Nicole Gerulat)

With the space and height that many vaulted ceilings provide, why not make the most out of this and incorporate a large, feature fireplace and chimney design. In this beautiful, open-plan living area, designed by Jessica Bennett of Alice Lane Interior Design, the grand vaulted ceiling, finished with eye-catching, dark wooden beams, has been connected to a stunning stone fireplace. ‘Thinking carefully about scale in interior design and ensuring that certain furniture pieces and design elements complement the size of your space is key for creating a balanced and harmonious design,’ says Homes & Gardens‘ editor in chief Lucy Searle. As shown here, the fireplace has been sized up to coordinate with the size of the room, with the design adding beautiful texture, shape and visual interest to this large open space.

3. Wow With White

(Image credit: Elizabeth Krueger Design)

Painting your vaulted ceiling white can not only create a clean and contemporary look, but it can enhance the feeling of openness and space in a room. In this calming white bedroom by Elizabeth Krueger Design, a simple, white and gray color palette has been used throughout to create a tranquil and relaxing sleep space, great for neutral bedroom ideas. The vaulted ceiling, defined by sleek, wooden ceiling paneling and exposed beams, uplifts the space with added texture and depth, with the dark gray suspended ceiling fan adding an element of contrast. A uncomplicated design that feels modern and luxurious, the vaulted ceiling in this bedroom adds welcoming character and an enduring design feature to the minimalist space.

4. Let The Light In

(Image credit: Lucie Ayres 22 Interiors, photography by Noah Webb)

The slanted design of a vaulted ceiling makes it the perfect place to house a skylight, allowing for you to maximize on the amount of natural light that comes into a room. ‘Skylights can not only transform the look of your vaulted ceiling, creating eye-catching windows to the outdoors, they can transform how a room feels, as ensuring your home is filled with natural light is essential for creating a comfortable, relaxing space,’ says Jennifer Ebert, Homes & Gardens‘ digital editor. In terms of placement and quantities of skylights on your vaulted ceiling, groups of windows often look best. As shown in this contemporary kitchen by Lucie Ayres from 22 Interiors, the vaulted ceiling benefits from two sleek skylights, beautifully brightening up the kitchen space.

5. Get Creative With Your Lighting

(Image credit: Creative Tonic Design)

As we have discussed, a vaulted ceiling can really open up a room, creating space for dramatic, larger scale designs for your lighting and furniture. Getting creative with your living room lighting ideas can not only create a unique, artistic display, but it can help draw the eye upwards to your vaulted ceiling, establishing an impactful and impressionable look. In this room, designed by Creative Tonic Design, the hanging pendant display, beautifully suspended from the dark vaulted ceiling, shares the same color palette as the bright furniture, artwork and accessories, creating an elegant connection between the ceiling and the designs found in the rest of the room. Whether you think cleverly about color and connection like in this room, or choose a modern, sculptural pendant to hang from a rustic vaulted ceiling, creative lighting designs can make for an intriguing and eye-catching design statement.

6. Make An Impact With A Barrel Vaulted Ceiling

(Image credit: Future)

We have explored many similar, angled vaulted ceiling designs, but for a real show-stopping look, a barrel vaulted ceiling can create a unique arched effect, with it’s smooth, rounded construction creating a mesmerizing focal point. The barrel vaulted ceiling in this open-plan new build has been cladded in whitewashed timber, creating a calming, Scandi-inspired look that feels relaxed, organic and inviting. With the wood adding warmth to the space, as well as the texture enhancing the shape and look of the barrel shape, this vaulted ceiling combines traditional construction techniques with a modern, minimalist style.

7. Make A Statement With Your Ceiling

(Image credit: Creative Tonic Design)

Many of us associate vaulted ceilings with more traditional, classic interior spaces, however, there is no reason why this striking architectural design feature cannot be brought into more modern spaces. In this luxurious, eclectic living room by Creative Tonic Design, the vaulted ceiling has been finished in a striking, gray gloss paint, creating a metallic like shine and polished effect. This gloss paint’s high-sheen finish has a beautiful reflective quality, allowing for light to bounce around the surface. Transforming the vaulted ceiling to create a unique feeling of interest and dimension om the ceiling, this contemporary room design unites a collection of contrasting materials, colors, styles and shapes to establish a one of a kind space.

8. Enhance A Vaulted Ceiling In A Bathroom

(Image credit: Future)

For the vaulted ceiling in this bathroom, a large mirrored design beautifully frames the window and gable end wall, celebrating the beautifully arched shape in the space. Making a beautiful design feature in this bathroom, the mirrored wall also increases the feeling of light and space in a room, perfectly complemented by the white paint on the ceiling. Thinking about the space below your vaulted ceiling and how you can further enhance the unique arched design can create an eye-catching impact.

9. Benefit From The Beauty And The Warmth Of Wood

(Image credit: Kimberly Harrison Interiors, photography by Kathryn MacDonald)

The timeless versatility, beauty and durability of wood make it an enduring feature and focus in interior design. Suited to both traditional and modern spaces, wooden ceiling cladding can bring in warmth, texture and color to a space, as well as beautifully highlight and show off your vaulted ceiling. In this dining room from a project in Northern California by Kimberley Harrison Interiors, she says the overall goal for the space was to create, ‘a modern and masculine design with textural elements to add warmth and visual interest.’

As shown in the space, an elegant juxtaposition is created between the wooden vaulted ceiling and modern furniture designs. The wooden panels lift the space with warmth and inviting texture, contrasting with the dark color palette and materials used throughout the rest of the room. The contrasting elements in this dining room work together to establish an elegant mix of the old and the new, united through sleek, simple shapes and an overall clean finish.

10. Use A Mix Of Materials And Finishes On Your Ceiling

(Image credit: Lucas Eilers)

In this traditional, rustic style kitchen by Lucas Eilers, the vaulted ceiling is defined by beautiful exposed beams and sleek white wooden paneling. A simple yet stylish mix of wood finishes, the two-toned design complements the colors found in the brickwork on the walls and floor perfectly, creating a cohesive and united design that celebrates the beauty of exposed materials. Finished with an elegant, black metal chandelier, this kitchen space feels cozy, welcoming and rich with material and tradition.

11. Create A Low Vaulted Ceiling

(Image credit: Dan Duchars)

Throughout this piece we have shown a range of beautiful, double-height vaulted ceilings, however, you can still create the same, stunning vaulted effect on a low ceiling. As shown in this elegant, country cottage kitchen diner extension, the vaulted ceiling adds character and charm to the space, with the low ceiling height still in keeping with the cottage’s original construction. With the white paint helping to make the room feel larger and brighter, benefiting also from the added skylights, this design shows how vaulted ceiling design can work wonderfully in smaller spaces too.

Source: Vaulted ceiling ideas: 11 dramatic design ideas for your ceiling | (homesandgardens.com); BY ZARA STACEY | AUGUST 01, 2022

Best Planting Ideas and Tips to Maintain a Healthy Garden for Fall Season

10 tips for ensuring your garden is prepped for the cooler temperatures:

  1. Plant your spring bulbs, including tulips and daffodils. Ideally, this should be done six to eight weeks before the ground is expected to freeze. You can also sow seeds of native perennials that require cold stratification.
  2. It’s best to leave perennials untrimmed (if the plants are healthy) until spring after air temperatures have increased for a spring clean up. Also, some plants produce seedheads that are attractive to overwintering birds and these can be left standing until early spring, at which time they can be pruned back.
  3. Get rid of any diseased foliage from infected plants. If left alone or composted, they can harbour a new outbreak next year.
  4. Divide dormant perennials that have become too large or numerous. These can be shared with friends or planted in other areas of the garden. Make sure new plants are well mulched to minimize frost heave.
  5. Fall is a great time to plant, so continue adding to your garden. In early fall, the ground is still warm and many plants are still actively growing roots.
  6. Water needle-leaved conifers (like pines, firs, spruces and cedars) and broad-leaved evergreens (such as rhododendrons) well into the fall. This ensures that they will be well hydrated before the ground freezes.
  7. If possible, leave the leaves on your lawn, as well as old brush piles or plant stalks. Pollinators and other wildlife can use them for shelter over the winter. If you do rake them, put them in your gardens where they can help to enrich the soil and provide habitat. Where walnut trees occur, do not add their leaves to the garden or compost, as they contain a chemical that can kill or diminish the growth of many plants (including a number of vegetable plants).
  8. Stake young and newly planted trees. Fall can produce some blustery weather in most parts of Canada and staking will help prevent damage from high winds or heavy wet snow, which can occur later in the season.
  9. Mulch garden beds to retain moisture and to protect your plants from rapid fluctuations in temperature. Fall is a good time to spread compost over the vegetable garden so that it is ready to be worked into the soil come spring.
  10. Don’t forget to fill up the birdfeeder when the weather is colder and sanitize it every two weeks to minimize the spread of disease.

Which Flower Bulbs Should you Plant in the Fall?

There are two types of flower bulbs. Hearty bulbs like tulips, daffodils, snowdrops and crocuses need to be cooled for a period of time before they’re planted, making them the perfect fall planting bulb for spring flowering. Tender bulbs like dahlias, begonias and gladiolus can not survive cold temperatures and therefore should be planted in the spring to bloom in the summer or fall.

Choose Good Quality Bulbs: Selecting good quality spring flowering bulbs is key to having a healthy, lush flower garden. Choose only those bulbs that are large, plump and firm, avoiding ones that are soft or have mould. As a general rule, the bigger the bulbs are, the more they bloom.

Where to Plant Flower Bulbs in the Fall: When planting fall bulbs, ensure that you plant them at least 4 feet away from the house. The heat from your house during the winter months can warm up the close-planted bulbs and cause them to bloom early. You can plant bulbs right up until the ground freezing prevents you from digging. Avoid planting in areas with low drainage.    

Add Bulb Fertilizer to the Soil: Use a fertilizer made specifically for bulbs in the soil where you’re planting them. While some consider bonemeal a great fertilizer, it is less complete than a fertilizer made specifically for bulbs. Fertilize the planting area generously. 

Position the Flower Bulbs: When positioning the bulbs in the soil, make sure to place them with the pointed end-up between 3- to 9-inches deep, depending on the type of bulb. Check the packaging to ensure you’re planting at the right depth. Remember, the depth referenced is where the base of the bulb should be when planted, not the tip. 

Add Soil and Water: Once planted, add additional soil to cover the area and then water liberally, but ensure that you don’t exceed the specified amount for the type of flowers you’ve planted. Add an additional layer of mulch for added protection against weeds and other growth.    

Aftercare of Flower Bulbs in the Spring: Make sure you continue to water according to the directions for your bulbs. Try to maintain a soil pH level of about 6 to 7 for optimal colouring. Keep your soil well drained as over-watering can cause the bulbs to rot. Don’t trim the leaves too short when they start to wither, as they soak up the sun and nutrients that will help next years bloom look great.  

Perennial Garden Ideas & Tips

Size Matters: Plan for the size of the plants at maturity. While a one-gallon shrub may look great in a certain spot, it may crowd out the surrounding plants when it’s fully grown and block the sun from others. Leave enough room for plants to grow their fullest.

Plant in Multiples: Grouping several of the same plant together creates greater impact and a more powerful punch of colour.

Repeat, Repeat, Repeat: Using the same plant over and over again gives the garden a cohesive look and ties together different planting areas.

Plan for All Seasons: While woody perennials, such as roses, are present all year, herbaceous perennials die back completely at the end of their blooming season, leaving only the living roots, bulb or tuber to sprout new growth the next year. Plan for those bare spots in the off-season garden by mixing woody and herbaceous perennials and choosing plants that have multiple seasons of interest.

Annuals Still Have a Place in a Perennial Garden: While perennials may serve as the basic skeleton of the garden, you can use annuals to fill in and flesh out bare spots. By choosing self-seeding annuals like cosmos or poppies, you can plant once and enjoy the effects year after year.

If It’s not Happy, Move It: While the idea of a perennial garden is to plant once and let it grow, sometimes it takes more than one attempt to find the right place for each plant. If it’s not thriving where it is, don’t be afraid to dig it up and relocate it.

For more info on planting ideas read the full article HERE

Source: NCC: 10 things you can do in the fall to maintain a healthy garden (natureconservancy.ca); Fall Planting Ideas: Fall Bulbs, Veggies & Flowers – Homedepot.ca

8 WAYS TO UPDATE YOUR BATHROOM WITHOUT REPLACING IT

1. ADD STATEMENT LIGHTING

(Image credit: Kingston Lafferty Design)

If there’s one decor piece you do indulge in this year, let it be a lighting fixture. Not only will it provide the kind of glow you seek, but it will also add oodles of style to the space. A bathroom chandelier perhaps, or a long, cascading pendant could do the job. For other fixtures, consider replacing all the bulbs with LEDs, for a more flattering glow. It’ll be bright but not glaring, and ideal for applying makeup. Add a pair of wall sconces – one on each side of the mirror. ‘For a fresh update, consider changing the light fixture, switches, or light bulbs,’ says New York interior designer Jarret Yoshida. ‘A dim bathroom hides tons of cosmetic defects. Also, get a light bulb between 2700-3500 for your bathroom for flattering illumination. Nothing too bright white or it’ll feel like you’re in a hospital or corporate reception area. Finally, we all know what a great, statement light fixture can do to a space, so indulge in one.’

‘I love to have sconces or lighting at face level, not above for great lighting,’ says Jennifer Morris, founder of JMorris Design. ‘Consider adding a light strip under a wall-mounted vanity, as it acts as the perfect night light. You can look at adding warmer or color light bulbs to see what feels right but make sure the kelvin range is similar within the room or the lights will feel funny when all are switched on.’

2. RE-PAINT THE WALLS

(Image credit: Studio Wodehouse)

Consider making a statement with a bold wall color; perhaps think of interesting paint techniques to add further interest. This is a change that will improve the entire room affordably. ‘Find a wall color to match with the interiors,’ says Jarret. ‘Most bathrooms have at most 2.5 walls of paintable surface and they’re usually fairly small, so go for it. Just be sure to do two coats and use bathroom grade paint intended for moist conditions. We like doing high drama small bathrooms so often choose a dark green or dark grey.’

3. SWITCH UP THE MIRROR 

(Image credit: Barbora Vokac Taylor Architect Inc. Photo credit Derek Shapton)

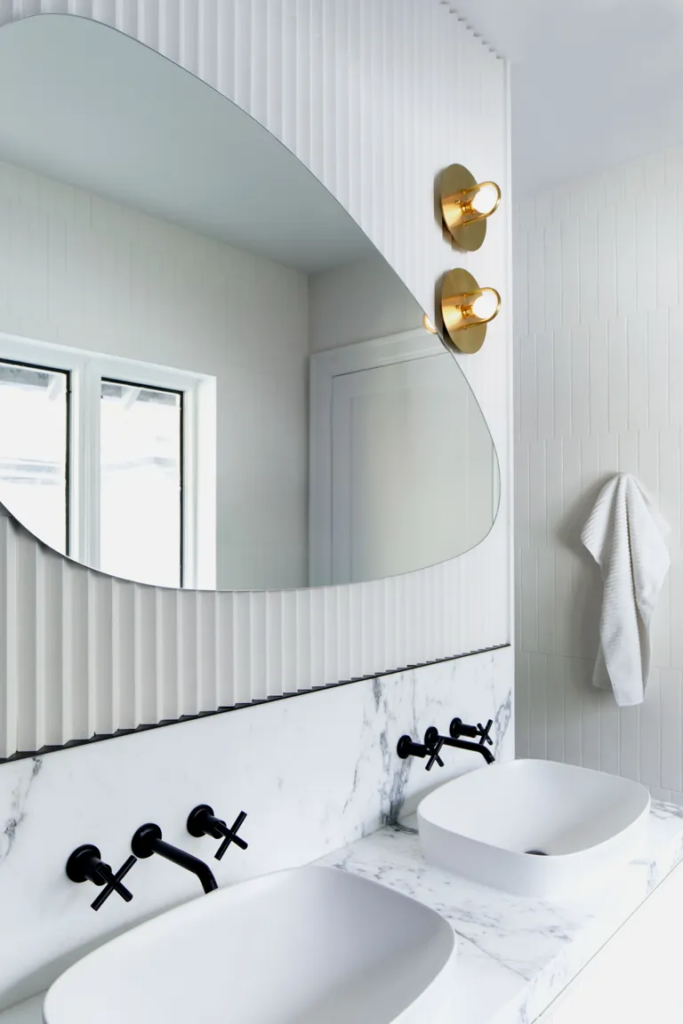
Mirrors are particularly important in the bathroom, as they need to be highly functional yet also in line with the overall decor and look of the space. ‘Adding a striking new mirror, with an interesting frame for example is a great way to create something new and eye-catching, and will make your bathroom feel like a spa,’ says Juliette Thomas, founder & director at Juliettes Interiors. You want to choose one that helps you carry out your daily tasks well, yet makes a statement in the room. For a characterful bathroom mirror, consider antique or gold-framed mirrors, ones that are in ornate designs, or even ones that are in organic shapes. 

4. WALLPAPER A POWDER ROOM

(Image credit: Studio Nato. Photo credit Hanna Grankvist)

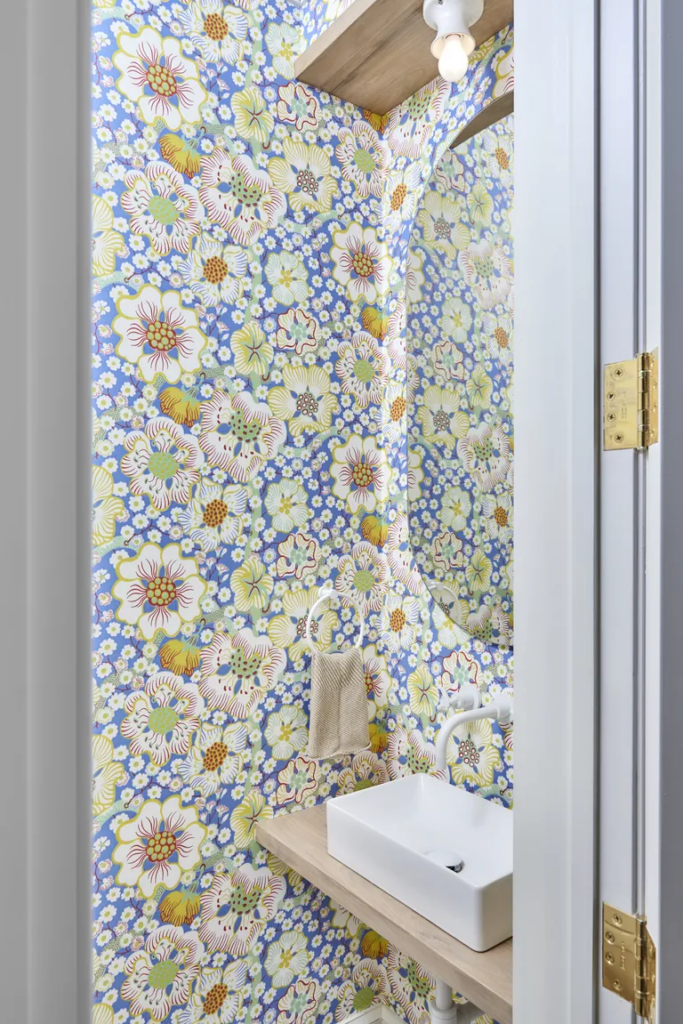
Bathroom wallpapers are a quick and simple way to add a punch to the room without the need for a heavy overhaul. With these, you can add drama, whimsy, or a sophisticated look to the room. Largely, vinyl wallpapers are best for a humid bathroom environment, as these are water-resistant and can be easily wiped down. These rarely have mildew or mold problems. If you live in a rental, it’s best to go with the peel-and-stick papers that are easy to install and take down. For low-traffic bathrooms like powder rooms, regular wallpaper can be used. While wallpapers are a no-no in the shower area, you could install them once behind a clawfoot tub. Choose bold colors, large prints, and more to give this room a big personality.

5. CHANGE THE BATHROOM ACCESSORIES

(Image credit: Mary Wadsworth)

‘Get new towels and spend some money on them,’ says Jarret. ‘While you can stick with a great solid white, remember that there are great patterns; ones that are looped and flat, fringed, and the like.  You use your towels daily so get some soft plush ones, all cotton with no artificial polyesters. In the summertime, nothing dries faster than a great thin Turkish towel. To donate your old towels to an animal shelter that always needs some for cleanups and washes of their furry wards.’ For your modern bathroom, bringing in trays, hooks and fresh bottles to hold your toiletries can go a long way in curbing the mess inside a bathroom, while also giving it a smart look.

6. PICK A MORE EXCITING SHOWER CURTAIN

(Image credit: Studio Nato photo Hanna Grankvist)

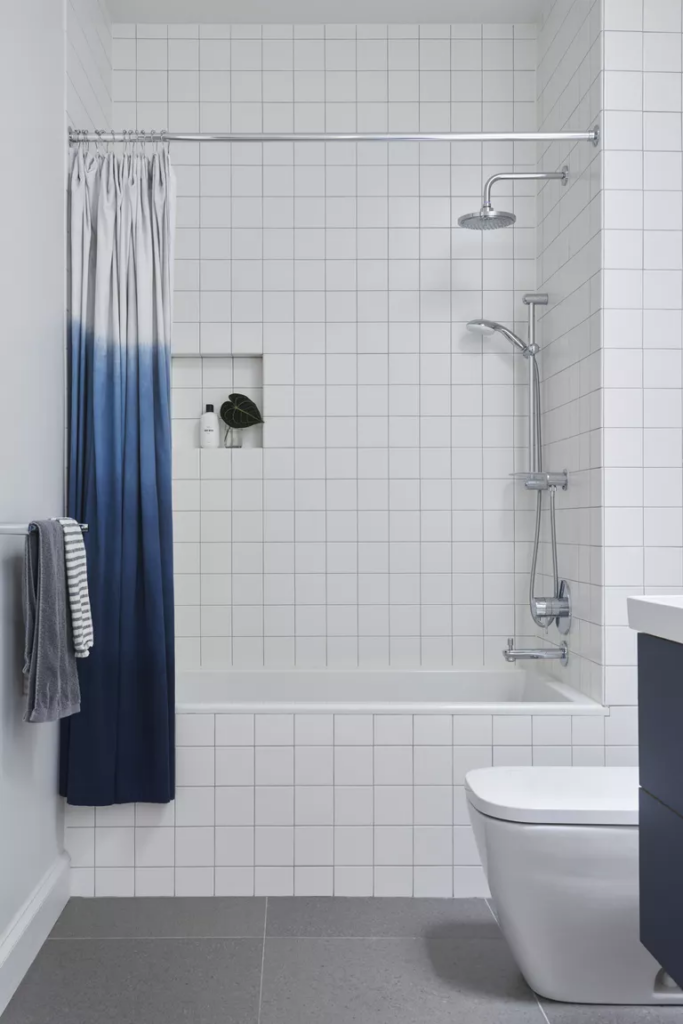
Let’s admit it – not everyone is a fan of shower curtains. Many prefer glass doors and partitions. But whether you’re renting or just have inherited a bathroom with a shower curtain, switching a standard curtain for one that brings color or pattern to your space can make a big difference. These are flexible decor pieces, so when you’re tired of the look, they can be replaced with one in a different style.

7. THOROUGHLY CLEAN YOUR GROUT

(Image credit: Elizabeth Baird Architecture & Design Shademaker Studio. Purveyor Design)

‘Another way that people rarely think about is giving the bathroom a nice, thorough cleaning,’ says Juliette. ‘Cleaning the grout and removing any mold, are easy ways to make a big difference and instantly give your space a fresh new look.’ White grout especially requires frequent cleaning and upkeep. If you’re up for a slightly higher budget change, then consider adding a new layer of dark-colored grout to your bathroom floor tiles or wall tiles. The best way to visualize how it will look is to get a live sample. This won’t be free, but the peace of mind is worth every penny.

8. BRING IN PLANTS

(Image credit: Workstead)

The oxygen-boosting properties, texture, color, and look of plants are unmatched. These are, in fact, a welcome addition to any room in the house. Consider adding houseplants in bathrooms to give the space a healthy, fresh, and crisp vibe. Of course, keeping houseplants in a humid, low-light condition is not always easy, which is why it’s important to choose the right varieties for this space. Largely, peace lily, Boston fern, snake plant, kentia palm, golden pothos, and a string of nickles are recommended for this room. Place these on the sink or move them near the window occasionally if it’s looking a bit dull. If you’re going in for Staghorn ferns and tillandsias, consider mounting them directly to a piece of wood, since their root systems do not need to be in a pot of soil.

For more ideas and the full article please click HERE.

Source: How can I update my bathroom without replacing it? | Livingetc; BY ADITI SHARMA MAHESHWARI; PUBLISHED JANUARY 18, 2023

Kitchen Countertop Trends 2023

1. TRY A RETRO LOOK WITH TERRAZZO

(Image credit: British Standard by Plain English)

Terrazzo is a kitchen trend that is experiencing a style revival – and it’s easy to see why. This highly individual material, which has been around for centuries, offers a restrained retro look with classic 1930s overtones. A base of marble, granite, and quartz (along with cement or resin binders) is mixed with shells, marble, or glass chippings to create a statement, particulate surface. Terrazzo is poured into custom-made molds and then transported to your kitchen. The surface is polished to give a high gloss surface and then sealed to prevent staining (because of the high marble content) and to create heat resistance. 

The result is a strong and beautiful surface. Each surface is completely bespoke – from your choice of marble and glass chip color, through to size and extras like an integrated backsplash and drainers. Material costs are low but intensive labor costs bump up the overall price to make this a luxury feature. ‘We have seen an increase in clients opting for terrazzo for their worktops, as it’s a great way of adding personality into the kitchen with a mix of colored stones,’ says Will Eaves, design and development director at British Standard by Plain English. ‘It’s durable and long-lasting but also very sustainable as it uses a lot of recycled materials such as offcut stone chips and glass fragments.’

2. EMBRACE WARM COLOR

(Image credit: Silestsone)

‘Warmer, natural tones that induce a sense of well-being and calm into the home have seen a surge in popularity within kitchen design,’ says Charlotte Hues, retail manager at Cosentino. ‘This shift toward earthy tones, as opposed to the minimalist, clinical white homes that were previously popular can be incredibly powerful in conveying calm and tranquillity in a space.’ Sunlit Days – Silestone’s first Carbon Neutral collection produced using a minimum of 20% recycled raw materials – features a variety of colorways inspired by natural, warm, Mediterranean shades. Think clay red, meadow green, and sea blue, modern hues that tap into our need to connect with nature. This is also a great choice if you are looking to tap into the sustainable kitchen trend.

3. GO FOR CONCRETE CURVES

(Image credit: Caesarstone/Kate Feather Kitchens / Birgit Mons Photography)

Curve appeal has never been so hot for the home – and sweeping, countertop edges will add a touchy-feely, ergonomic silhouette to your kitchen. This softer kitchen mood ties in with our love affair with natural materials and sophisticated pastels, as shown here in this kitchen with a curved, concrete-inspired worktop. ‘Curved countertop designs are having a resurgence in the kitchen,’ says Mor Krisher, Caesarstone’s head of design. ‘Beautifully organic, rounded edges immediately soften a space and bring feelings of calmness to the kitchen. These curved edges remind us of our natural surroundings, making us feel grounded and serene. Curves are inviting and are especially suited to family homes or those entertaining moments when guests can comfortably sit around the kitchen island.’ 

4. CREATE INTEREST WITH DETAILED EDGING

(Image credit: Blakes London)

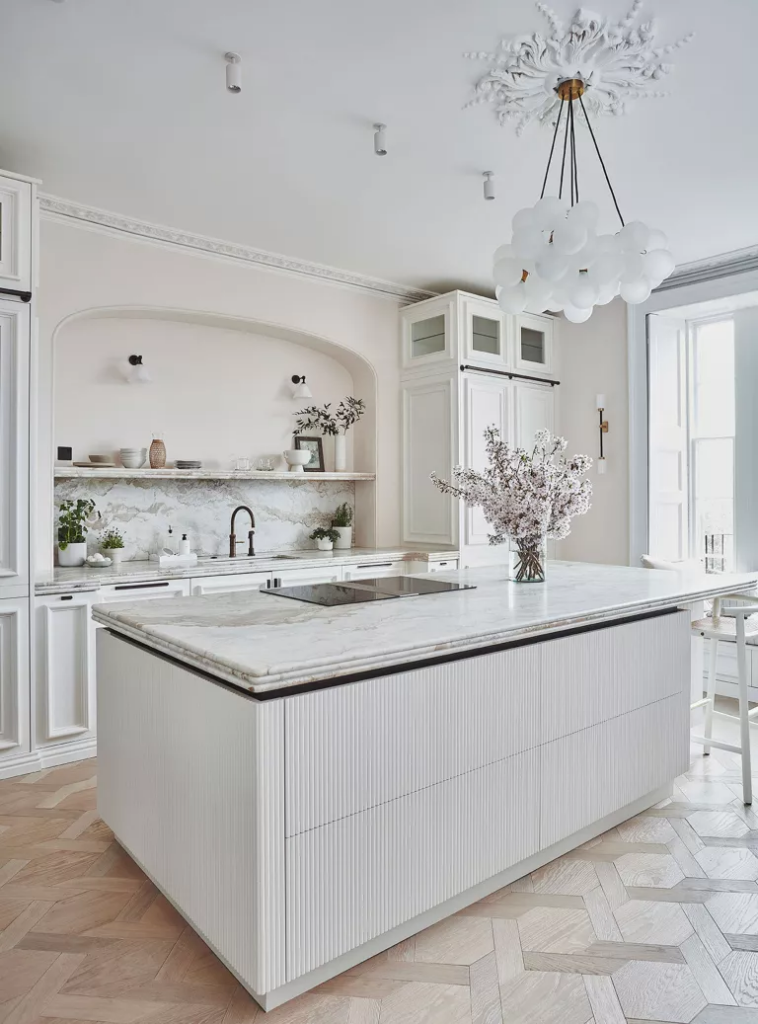
Elevate your countertop by adding detailed edging to your design. In this Georgian townhouse, the modern kitchen was relocated from its original position on the lower ground floor to the grand, formal reception room on the upper ground floor. The grand space – tall ceilings, ornate cornices and statement Regency windows – demanded an impressive yet classic design. This included a traditional paneled door front offset with gently ribbed detail on the island. 

‘The triple, bull-nosed edging on the shelf and countertops offer a classy detail, picking up the ribbed theme on the island,’ says Magnus Nilsson, lead designer at Blakes London. ‘It was also incorporated into the gently curved edges on the island.’ To create such an intricate counter that oozes sophistication, a 20mm thick slab of marble is finished with a bullnose detail cut into the edge. The triple-stacked look is achieved with two more separate strips of stone – often offcuts of marble – also finished with a bullnose edge and then glued to the underside of the main surface. ‘This effect can only be achieved with a solid stone like marble or a quartz composite,’ adds Nilsson. ‘It doesn’t work on porcelains or man-made stones due to the natural veining that is required to achieve the effect.’

5. USE TWO DIFFERENT MATERIALS FOR THE SAME DESIGN

(Image credit: deVOL/Our Food Stories)

You don’t need to stick to one countertop material for your kitchen design. Combining two different materials, such as timber and quartz, or concrete and marble, creates a unique contrast in your room. Pairing two materials will also help to zone functions: a solid wood-topped island unit offers a modern rustic look while stainless steel or stone around a sink area creates a hardworking hub for preparation and washing up. Mixing and matching two countertops is a slick way to add texture and color to a neutral mood. In this kitchen by deVOL, a mix of bespoke aged copper on the island is offset with natural Arabescato Corchia marble on the perimeter cupboards. ‘A pale stone with dark swirls of veining throughout is a fantastic choice, especially paired with one of our matching fluted Tuscan farmhouse marble sinks,’ adds Zoë Parker, head of PR at deVOL Kitchens.

6. INTRODUCE VIBRANCY WITH LAVA-STONE BRIGHTS

(Image credit: Flax Interiors/ Bess Friday Photography)

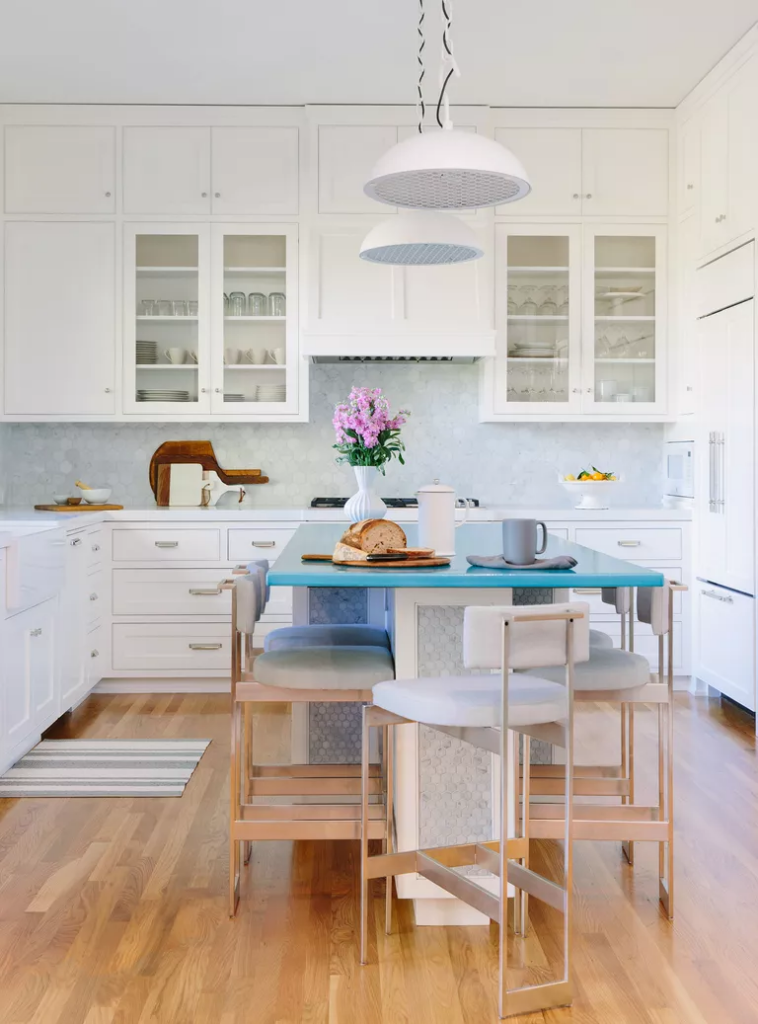
Try something different with a lava-stone countertop. This natural stone is made from blocks of volcanic lava rock – a solidified magma, or lava that has erupted from a volcano. Countertop slabs are cut from lava blocks and coated with an enamel glaze of any color and then placed in a kiln – the result is a smooth, super durable finish. ‘Sometimes, durability and beauty are at odds with one another,’ says Emily Flaxman, owner and principal designer at Flax Interiors

‘Some of the most beautiful materials are also the most delicate and aren’t the right fit in a bustling and busy home kitchen. In this colorful kitchen project, we sought the best of durability and beauty for a kitchen that is the hub of the home. I brought a pop of color into my client’s kitchen with a slab of bright teal lava-stone on her island. It’s a great choice for kitchen countertops as it’s extremely durable, non-porous, and resistant to heat and cold. It’s also available in a wide range of fun colors. The teal brings a joyful happiness and statement piece to what would have been an otherwise neutral kitchen.’ The enamel may develop a distinctive crackled finish called ‘crazing’ as the slabs cool – but this is a unique, signature look to lava-stone. ‘The glazing process is where there is endless potential for custom colors and creative designs,’ adds Flaxman. ‘It also improves the durability of the countertop by making it impervious to heat.’

7. LET IT FLOW WITH A WATERFALL EDGE

(Image credit: Caesarstone)

Achieve a luxe, elegant mood for your kitchen counter with a waterfall edge that flows down the side of a unit, to create a striking, one-piece silhouette. ‘The right surface offers a sense of elegance, even in a busy family household,’ explains Jon Stanley, vice president of marketing at Caesarstone. ‘Consider a marble-look ‘waterfall’ edge – a striking island feature where the kitchen countertop continues at a 90-degree angle, flowing to the floor, creating a seamless continuation of the quartz or porcelain surface. You will need to choose a material carefully as you want the entire design to look like it’s made from one continuous slab.’

8. GLOW WITH COPPER COUNTERTOPS

(Image credit: deVOL)

The warm glow of a copper counter is hard to resist – particularly in a modern rustic kitchen that marries a palette of feel-good natural materials. Copper not only exudes a tactile warmth, but it also offers so many practical plus points for the busy, family kitchen too. ‘Copper is shiny and has an incredibly fluid, ever-changing patina,’ adds Helen Parker, creative director of deVOL Kitchens. ‘It looks rare and precious and turns out to have amazing antibacterial properties which makes it even more desirable. What a special product it has turned out to be – so glamorously chic and a little bohemian with the power to kill pathogens in minutes.’

At deVOL, copper surfaces are made to order to ensure a completely sealed unit. They are fabricated from 1.5mm thick copper wrapped around a water-resistant MDF substrate to limit denting and hand-welded or soldered at the corners. ‘We also offer an option with integral copper sinks and create a very distinctive draining section using a tactile arrangement of tiny, raised domes from hammering the underside of the copper,’ adds Parker. ‘Copper has a long history of being used for countertops and has amazing, inherent antibacterial properties, although we do not recommend food preparation directly on the copper as it can taint the taste of food – we also recommend you don’t cut directly onto copper as it is soft and will scratch.’

9. MAKE A STATEMENT WITH A BESPOKE DESIGN

(Image credit: Ledbury Studio)

Make the counter the star of the kitchen with an incredible bespoke design. ‘Designed in collaboration with Lara Bohinc of Bohinc Studio, the island top is made from a selection of Italian marbles tessellated together and bordered by a brass edge trim,’ explains Charlie Smallbone, founder of Ledbury Studio. ‘There’s no doubt that it’s a work of art in its own right.’ Although marble is one of the softer natural stones, it is still a durable material that can last a lifetime with proper care. Smallbone suggests regularly sealing the surface and immediately cleaning any spills, particularly red wine or anything acidic. ‘The surface will also develop knocks and small scratches, but this adds personality and patina that reflects its long life in your kitchen,’ he adds.

10. PICK OUT A VERSATILE PORCELAIN

(Image credit: The Stone & Ceramic Warehouse)

If you thought porcelain was just for plates and bowls, it’s time for a rethink. Porcelain is now a top choice for kitchen counters – and for many reasons. ‘Thanks to its durability, easy maintenance and hygiene, porcelain is fast becoming the go-to material of choice for countertops,’ says Raquel Dominguez, retail senior area manager at Laminam. ‘Its supreme versatility means it can be used for multiple applications, both indoors and out. Indoors, it is ideal for kitchen countertops, but can also be used to create a seamless look by matching it on floors, cladding, furniture, or even sinks. What’s more, there are many ways to utilize porcelain outside too, including flooring, wall cladding, or even as part of an outdoor kitchen thanks to its weather resistance.’

For the full article please click HERE.

Source: Kitchen countertop trends: 10 standout surfaces for 2023 | (homesandgardens.com), BY LARA SARGENT | PUBLISHED JUNE 11, 2023

Real Estate Crush of the Week: $3.9 million for a Huntsville home with a unique, award-winning design

Toronto, Real Estate, Surreal Estate, MUskoka, Bridgehouse: the bridge

Location: Port Sydney, Muskoka
Price: $3,899,000
Size: 2,476 square feet
Bedrooms: 4
Bathrooms: 2
Agent: Trevor Maxwell Bond, Bosley Real Estate

The Place

A one-of-a-kind five-bedroom, two-bathroom winterized cottage built in the shape of a truss, known as the Bridgehouse. It sits suspended above a five-acre property overlooking Mary Lake, is shrouded by dense Muskoka greenery and is a 15-minute drive from Huntsville.

The History

Architect Mariana Leguia and her husband, Angus Laurie, moved to Peru in the 2010s and fell in love with the simpler way of life. So, upon returning to Toronto, they ditched their house in the city with the goal of building a secluded lakeside property in Muskoka. Their vision: a bridge-shaped wooden cottage laid over two buttes—a distinct departure from the classic A-frames that dominate the region. They suspended their creation with steel beams, supported it with massive concrete footings and finished it with enormous windows.

Mariana and Angus moved into their stunner in 2016 and received both an Ontario Wood Design Award and an International Architecture Award within the next two years. Hungry for a new project, the two are now selling the Bridgehouse.

Here’s the front-facing view: nearly 100 metres of unstained cedar backing an inverted-V double staircase leading to the roof.

Toronto, Real Estate, Surreal Estate, MUskoka, Bridgehouse: front

The cabin has east and west entrances, and each wing is lined with built-in storage.

Toronto, Real Estate, Surreal Estate, MUskoka, Bridgehouse: storage

All paths converge in this central grand room, which houses the kitchen, the dining area, the living area and sliding floor-to-ceiling glass doors.

Toronto, Real Estate, Surreal Estate, MUskoka, Bridgehouse: open concept

The floor-to-ceiling cedar panels add warmth to the home.

Toronto, Real Estate, Surreal Estate, MUskoka, Bridgehouse: living area

A Stûv wood-burning fireplace and central propane tank help winterize the house.

Toronto, Real Estate, Surreal Estate, MUskoka, Bridgehouse: fireplace

This is the balcony, which overlooks a ravine.

Toronto, Real Estate, Surreal Estate, MUskoka, Bridgehouse: balcony

Kitchen cabinets camouflage an integrated wine fridge and down-draft cooktop. The island, with a double waterfall sink and front and rear storage, is another practical feature piece.

Toronto, Real Estate, Surreal Estate, MUskoka, Bridgehouse: kitchen

Behind the kitchen is the pantry, equipped with a Sub-Zero fridge, an oven and a stacked washer-dryer.

Toronto, Real Estate, Surreal Estate, MUskoka, Bridgehouse: laundry

This reverse view highlights even more pantry storage.

Toronto, Real Estate, Surreal Estate, MUskoka, Bridgehouse: pantry

Here’s the grand room as seen from the forest.

Toronto, Real Estate, Surreal Estate, MUskoka, Bridgehouse: exterior grand room

The east and west wings each include two bedrooms and one bathroom. 

This bedroom has sliding doors that open to the side yard.

Toronto, Real Estate, Surreal Estate, MUskoka, Bridgehouse: second bedroom

Both bathrooms have walk-in showers and white marble vanities.

Toronto, Real Estate, Surreal Estate, MUskoka, Bridgehouse: bathroom

Outside, Mariana and Angus built a pier that stretches into Lake Mary.

Toronto, Real Estate, Surreal Estate, MUskoka, Bridgehouse: deck

This view from above shows off the Bridgehouse’s privacy.

Toronto, Real Estate, Surreal Estate, MUskoka, Bridgehouse: aerial view

Source: Surreal Estate: $3.9 million for a Huntsville home with a unique, award-winning design (torontolife.com), BY ALEX CYR | PHOTOGRAPHY BY BIRDHOUSE MEDIA |  JULY 17, 2023